How to Apply Vinyl Lettering to Windows, Cars and Walls (Without Bubbles)
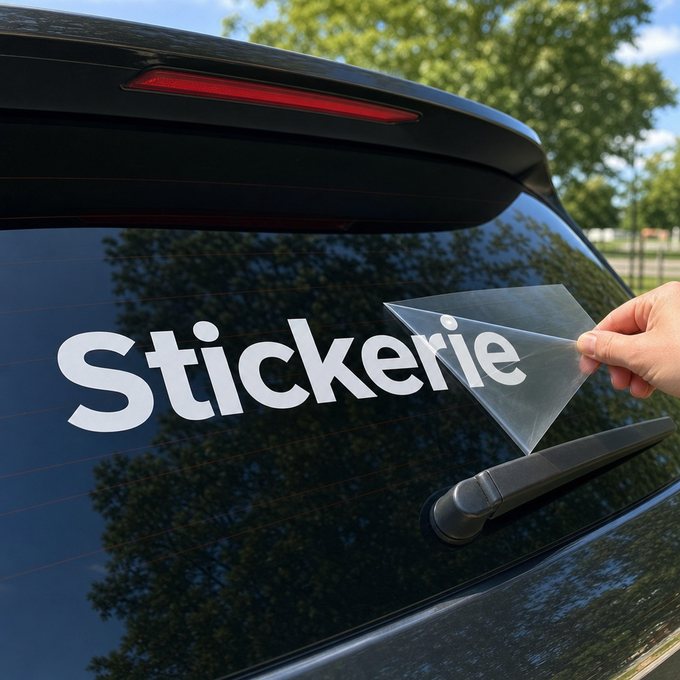
Vinyl lettering looks simple until you're holding a sheet of transfer tape over your car door wondering which corner to peel first. Good news: once you know the order of operations, it's a 10-minute job with zero bubbles and a clean, painted-on look.
This guide covers everything from prepping the surface to weeding tiny letter holes to peeling the transfer tape at the right angle. We'll also flag exactly what changes between windows, car exteriors and interior walls, since each surface has its own quirks.
What Vinyl Lettering Actually Is
Vinyl lettering is cut adhesive vinyl with no background, just the letters or shapes themselves, sold on a backing sheet with (usually) a transfer tape layer on top. It's different from a sticker with a printed background: every letter is individually cut, so it reads as if it were painted directly onto the surface.
It works best on smooth, sealed, non-porous surfaces: glass, cured painted metal, finished walls, smooth plastic, tile. It struggles on fabric, raw wood, unfinished drywall, or heavily textured stucco, since the adhesive needs full, flat contact to bond.
Prep the Surface First (Most Bubbles Are a Prep Problem)
Ninety percent of bad vinyl applications trace back to a surface that wasn't actually clean or dry. Skip this step and you'll fight bubbles no matter how good your technique is.
For windows and cars, wipe down with rubbing alcohol or a proper glass cleaner, then dry completely with a lint-free cloth. If it's a freshly painted car, wait at least 30 days for the clear coat to cure before applying anything. For walls, satin or semi-gloss paint holds vinyl far better than flat or matte finishes, and freshly painted walls need 2 to 3 weeks to fully cure first.
- Clean with alcohol or glass cleaner, then dry fully, no streaks or residue
- Apply in a room or outdoor space between 50F and 90F for best adhesive bond
- Avoid dusty, humid, or freezing conditions, all three cause weak adhesion
- New paint (wall or car) needs curing time before vinyl goes on
Weeding: Getting Rid of the Extra Vinyl
Weeding means peeling away the excess vinyl around your design so only the letters remain on the backing sheet. This is where a weeding hook (or a sturdy sewing pin) earns its keep, especially for small letters like e, a, o, and R where the little inner pieces need to come out cleanly.
Work under bright light at a low angle so you can actually see which lines are cut. Go slowly. Rushing this step is the number one cause of torn letters.
Applying With Transfer Tape: The Bubble-Free Method
Transfer tape is the low-tack film that lifts your weeded design off the backing sheet and carries it, as one piece, onto your window, wall or car. Here's the order that actually works.
For large window lettering, a lot of installers use the wet method: a light spray of soapy water on the glass lets you slide the design into perfect position before squeegeeing the water (and any bubbles) out from the center toward the edges. This trick only works on glass, not on walls or car paint.
- Position the weeded design where you want it and tape one edge down as a hinge
- Lay transfer tape over the design and burnish firmly with a squeegee, corner to corner
- Slowly peel the paper backing away at a low angle, checking that all letters lifted with the tape
- Place the design on the surface using your hinge as a guide, then burnish again through the transfer tape
- Peel the transfer tape back at a 45 degree angle, slowly, checking the letters stay put
- Pop any stubborn bubbles with a pin and press flat with your fingernail or squeegee
Windows vs Cars vs Walls: What Actually Changes
The technique is the same everywhere, but a few details shift depending on the surface.
Window lettering usually goes on the inside of the glass if it's meant to be read from outside (storefronts, car rear windows), which also protects it from wipers and weather. Car exterior lettering should sit clear of seams, rivets and door edges, and needs 24 to 48 hours before its first wash. Walls are dry-application only, no soapy water trick here, and lighter, even pressure prevents peeling texture off older paint.
- Windows: use the wet method for large pieces, apply to the side that best protects the vinyl
- Cars: clean, cured paint only, avoid panel gaps, let it set a day or two before a car wash
- Walls: dry method, satin/semi-gloss surfaces, gentle pressure on older or flat paint
Removing Vinyl Lettering Without Damage
Removal is easiest with a little heat. A hairdryer or heat gun on low, held a few inches away, softens the adhesive so you can peel the vinyl at a low angle without tearing or leaving stubborn residue behind.
If any sticky residue is left over, an adhesive remover (or even a bit of rubbing alcohol) wipes it away cleanly on glass and painted metal. On walls, test a small area first, since older or cheaper paint can lift with aggressive scraping.
- Clean and fully dry the surface first, most application problems are actually prep problems
- Weed slowly with a hook or pin, especially small letter holes, to avoid tearing the design
- Use the hinge method with transfer tape and burnish corner to corner before peeling
- The wet (soapy water) method works great for window lettering but not for walls or car paint
- Give new car paint 30 days and new wall paint 2 to 3 weeks to cure before applying vinyl
- Warm vinyl with a hairdryer before removal for a clean peel with no residue
Frequently asked questions
How long does outdoor vinyl lettering actually last?
Quality cast or durable calendared vinyl holds up for a few years outdoors depending on sun exposure and climate. Direct south-facing sun and harsh winters will shorten that. It's a decal, not a forever tattoo, but it's built for daily weather, not just a season.
Can I apply vinyl lettering in cold weather?
You can, but the adhesive bonds best between 50F and 90F. Below that, tack strength drops and you risk peeling edges within weeks. If it's cold outside, apply indoors and let the piece sit a day before it faces winter conditions.
Will removing vinyl lettering damage my car's paint or wall paint?
Properly cured paint (car or wall) handles vinyl removal fine, especially with a little heat to soften the adhesive first. The risk is on already-flaking or very old paint, where any tape or vinyl can pull surface paint with it. Test a corner first if you're unsure.
What's the difference between transfer tape and the vinyl's own backing paper?
The backing paper is what the vinyl ships on and gets weeded from. Transfer tape is a separate low-tack sheet you apply on top after weeding, which lifts and carries the design as one piece onto your final surface. You need both for a clean application.
Do I need special tools to apply vinyl lettering myself?
A squeegee, a weeding hook or pin, and a bit of alcohol for cleaning covers it. No heat gun required for application, just for removal. Most first-timers get a clean result on their second or third letter once they get a feel for the peel angle.
Ready to print?
Ready to letter that window, wall or bumper? Start your custom vinyl lettering order and get a free proof before anything gets printed.
Start your order →